Monday, August 31, 2009

Grandpa's Utility Quilt (now Theresa's Quilt)


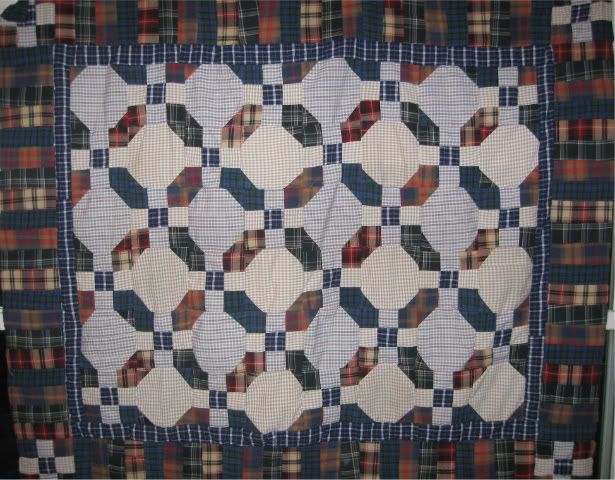
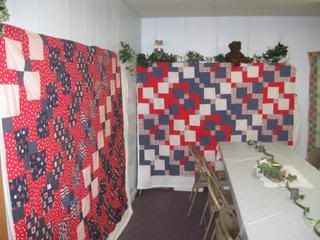
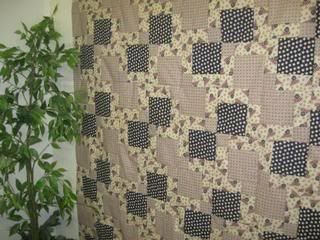
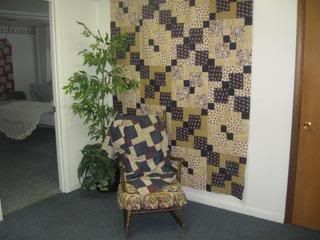
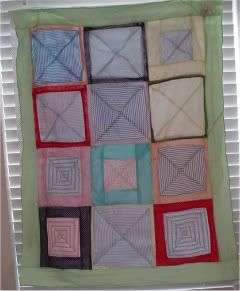
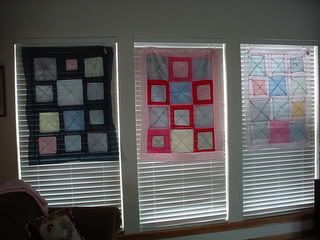
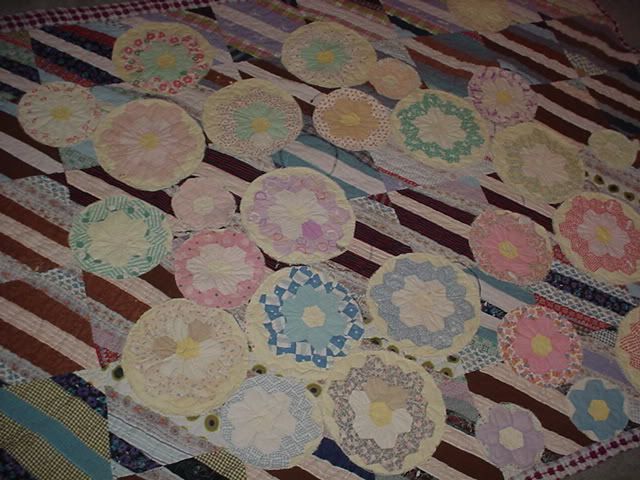
I finally got to do a little machine quilting on this reconstruction piece. I can't wait to get to get it back to my sister. I have my fingers crossed that her girls will be able to get many more years of snuggle use from this heirloom.
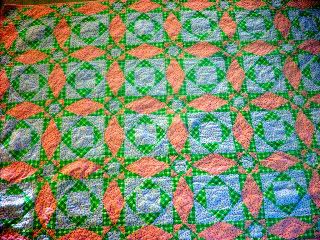
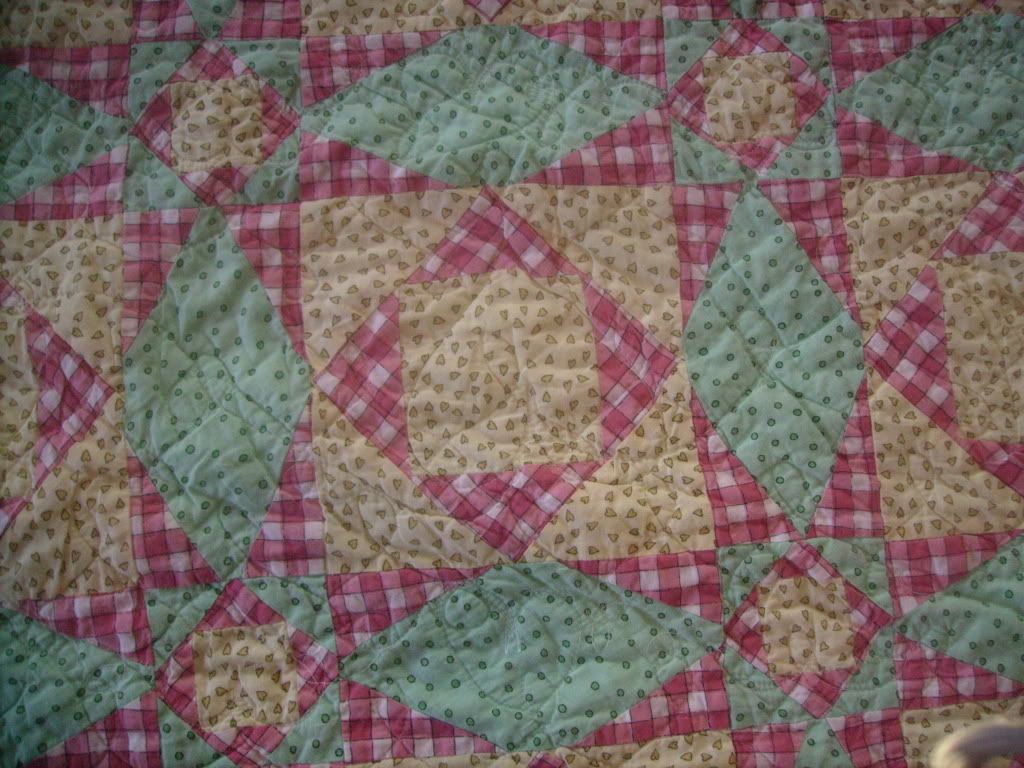
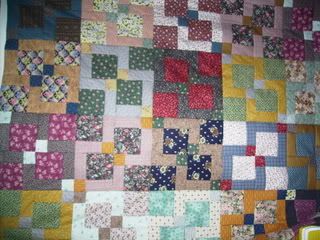
Originally a machine pieced top and hand quilted to a flannel back, this beauty has shown the wear of time and use. My younger sister was torn up when she machine washed the heavy quilt and discovered "Holes the size of small plates".
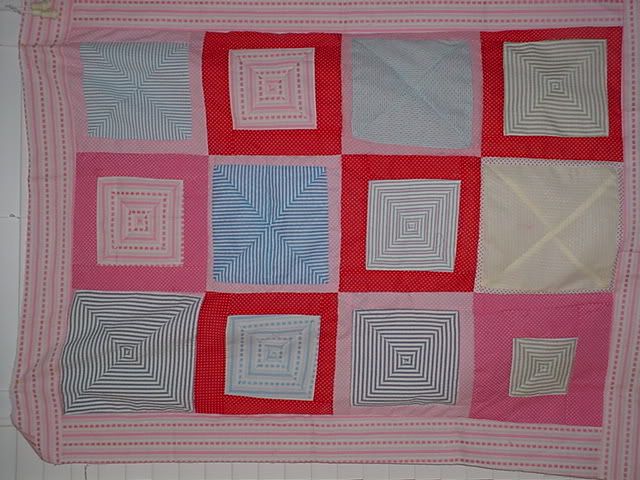
I am guessing this piece was made by a friend of our grandmother's sometime in the 1960's.
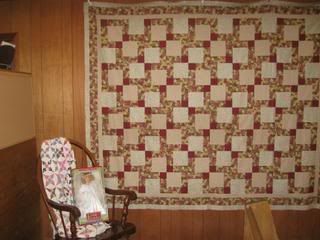
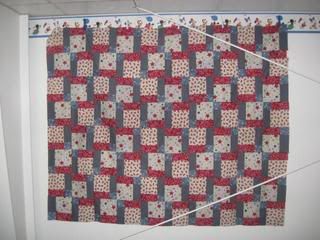
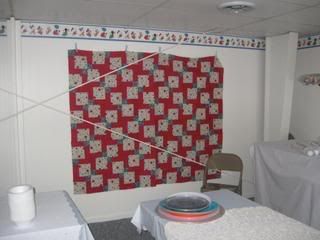
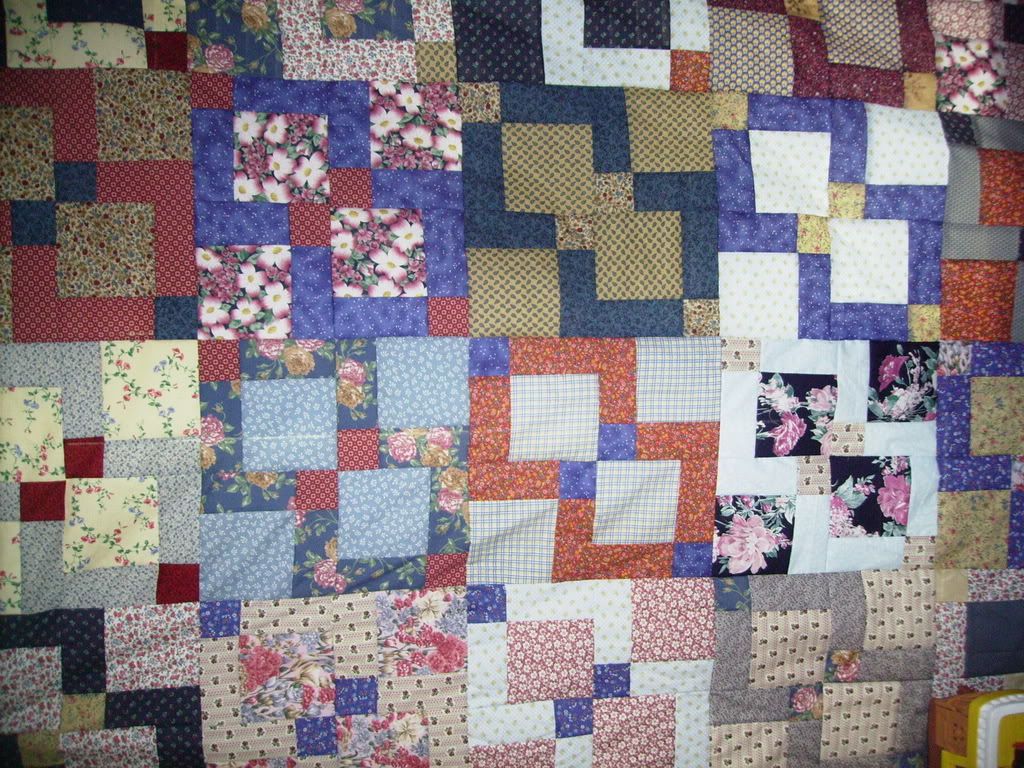
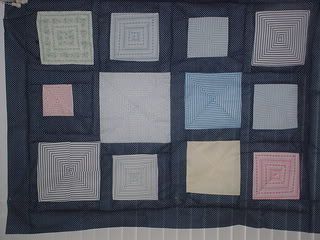
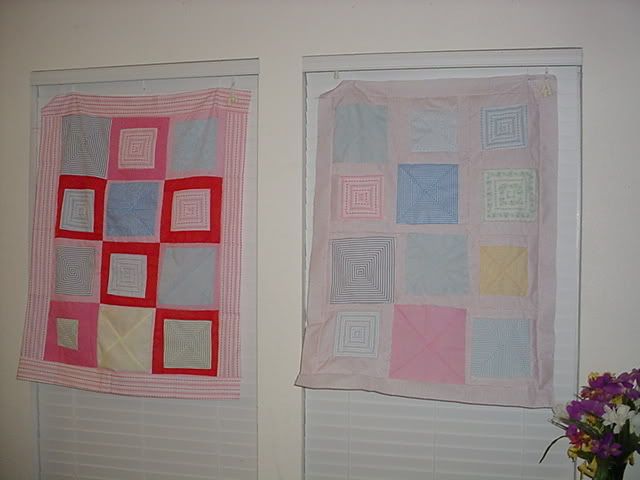
I was going to machine applique the 'flowers' on after I fixed the back. The top is so heavy that I could not maneuver it evenly under my regular machine. I struggled through getting the 'feed sack' circles sewn to the back to give a solid surface to applique the cutter quilt pieces to on the front.
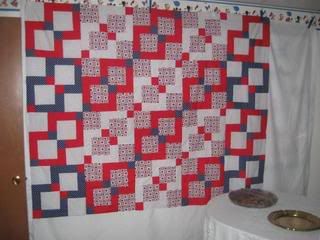
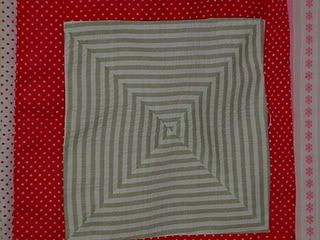
My solution was to hand stitch the flowers to the top using crochet thread. (I love texture) Then I got to pin it in to the quilting frame and play with free-hand machine sewing the flowers.
I am pretty happy with the result. I think the quilt has the same 'feel' of a comfort snuggle under quilt AND has a little of my spirit holding together till the next run in with a washing machine.
I promise to only give it back to Sis if she promises to let me handle the washing. Who would have ever thought I would volunteer to do laundry!! - cw

7 shirts quilt (Thanks Nancy!)

Nancy posted another lovely picture a fan sent her of a quilt made from the 7-shirts mystery we did last year.

I thought since I am re-visiting past projects I would dig out my version to share:

You can get Nancy-Rose's Instructions if you click HERE


I was lucky to find shirts during a $5.00 a bag sale- Hubby picked them out and paid, thus leaving my Self-Imposed NO BUY in tack!


I think in my original post I bragged that this one would be for him.

In the spirit of Re-Gifting it has been passed on to Favorite Oldest Daughter's Boyfriend.

She thought the colors would look good in the Man Cave (the pool room in the garage)

I narrowed the shirts down to the number needed for the Mystery.

Nancy said to use similar materials, I knew it didn't mean ME so I mixed flannels and cottons

Looks good, but sews Not Sew Good! I am not an iron-er but did have to finger press a bit before re-sizing.


I liked how the blocks were coming along. I can see me doing this pattern a couple of more times- I love it in flannel.


I never did get a photo after it was quilted.
I think I did a herring bone border to border and for the life of me can't remember what was on the back.
I know I didn't piece the back.
If you missed the link above you can see the instructions from Nancy's site-- http://thethriftyquilter.blogspot.com/2009/06/seven-shirts-seven-steps-one-thrifty.html

Wednesday, August 26, 2009

SCRAPPY STARS

Hate to admit that this one is STILL not quilted. It was made to be our bed quilt. The top is 105" x 126". I have yet to take a good picture of it.

These shots are from my old blog.


If I remember, Erin started me thinking about this layout after she kept showing her progress. I decided to make my stars a bit smaller then hers and my setting strips are 2" to start with.


This top kinda grew on me. It was just so much fun seeing the stars come together that I just kept making a couple of more.


The star block are from stash that was irregular sizes. I started with 12 piles that were going to be blocks. I used a solid and two prints per pile. The solids were used either in the background, the star or the accent to the star.


The setting strips were from a sets of pre-cut 4" strips that I had left over from a 'cutting' stage.


I decided on a 12 1/2" star so the setting strips would work out. The 4" strips were sub-cut to 2". Then sewn into strip sets and cut at 12 1/2" The left overs were cut at 2" and worked into the 9-patches in the setting sqs.


Here is a picture of my fancy pattern!


The bordered star measured

about 21 1/2"

If I don't get around to quilting this in the next couple of years, I will take it apart and make smaller quilts from it. For some reason I just really seem to put off the BIG projects.


I have changed my mind several times on what I plan to use for the back. What ever I do it will be BIG and MINE.


Monday, August 24, 2009

From the Archives: Storm at Sea

As a Disclaimer:

This photo was manipulated on PhotoBucket.

The true colors are not near as exciting!

One of the peers was inquiring if 'anyone' had made a Storm at Sea.

I have only made one.

It is on my LIST TO DO again when I have the time.

This couch size one was made just to see if I LIKED the pattern. It cracks me up when I see it (we still have this in our 'collection' for the kids to use when they are visiting)

At the time I had the urge to sew, I didn't have a collection of fabrics to pull from and didn't have the desire to go shopping. (I know- what was I thinking) I had 'seen' this pattern in a mag. It was designed to be paper pieced. Of course I knew I could do it quicker (No one really cares about points on the stars- right?)

For some reason (I don't remember why) I had a couple of yards of these three prints. How can one go wrong with Red, Yellow & Green!

This quilt was sewn in a weekend and originally 'tied'. A few years later I practiced machine quilting on it and it has several border to border patterns. Don't think I am going to worry about it falling apart any time soon.

There is not a label on it so I don't know the date, most likely late 1990's. I do remember strip cutting the fabrics so it has to be after I got a rotary cutter. I didn't paper piece it, b/c I have always preferred a little wiggle to my work, even when I am just practicing.

This utility quilt has gotten a lot of use and visited a few parks for picnics. On my TO-DO list to make in scraps I hope to do Dark, Med. & Lights or possibly R W & B.


D-9 Displayed at Ladies Night 2008

Our quilting group had decided to make the 9-patch in RW&B for the Down town Fire Station.

Sad to admit that we have the tops finished but are WAY behind in getting them quilted.

Too many excuses to even start listing but the main reason is I am just slow. We did not put a time limit on the project and it keeps getting moved back.

I may have to open it to the public to help finish. I thought it may be fun for the spouse or other relative of the recipient to participate in the quilting or binding process. I also like the idea of using a personal sheet on the back, something that reminds them of home. However we decided to proceed, these will be beautiful quilt to share with our guys to spruce up their bunks in the station.


Mary is learning to quilt on my machine and I hope to let her take on this project when she is ready. We have 9 tops ready to quilt and hope to finish them to gift for Christmas! (Notice I didn't commit to a year)

Sunday, August 23, 2009

From the Archives- D-9

The Disappearing 9-patch was a pretty popular pattern a couple of years ago. I don't remember where I first saw the concept but I do remember a fellow blogger posting pictures of charity quilts she was working on and I 'had to try' one for myself.

Here is one thrown together w/Valentines Day Prints. Still not quilted but waiting for the chance to be a baby quilt for a little one born in February. I don't 'date' my projects but am pretty sure this at least a couple of years old already.


This Holiday Day print was made for favorite DIL, Kelly. She had helped me cut a tub of fabrics and picked this pattern as a reward for her hard work. If I remember correctly I 'let' her quilt it herself. I am a very nice MIL!
Kelly know if she wants it finished she has to do it herself.


Good Friend Linda, wanted a Navy Quilt for her son who is serving. She had four pre-printed pieces that we used in the corners and the D-9's were planned to match them in size. Linda tends to purchase fabric with out knowing what she is going to have me do with it. We had just exactly enough to complete this quilt.


These are the first two D-9's I made. I used scrap 6" sqs and totally enjoyed seeing each block come together. I set the top randomly. Just goes to show that you can't do this pattern 'wrong'


Of these two tops, One has been quilted and given away. The other is still waiting it's turn to be gifted. I have been wanting to practice some free motion quilting, this may the top to work on.
I have several other Disappearing 9-patch tops that need finished. I may have to show them off in another post.


Saturday, August 22, 2009

16 patch- EXCHANGE Block Quilt 2000

If I can find the original 'booklet' I will scan this project and show off the gals work. We did this project as a block exchange. Several quilts were made and given away. Of the five I made, two are still in the closet for one of the grand-kids to be chosen later.


Our MEN get together and serve the Dinner. We have a great time each year. Not only do the 'serve' they clean up. The next photo is showing how they clean up the left over food- :)


Just Wondering- What say YOU?

I have been posting on BLOGGER now for a short while. My question is should I revisit past post from the 'other' site and move them over here?

I started out my quilting blog on a site that has crashed a couple of times. Each time I started over and 'wrote' what I was working on etc...

Today I was e-mailing with a new friend and wanted to send a link to a project I had done and I don't have a link b/c it was on the site that is gone.

Personally I don't mind telling my 'stories' over and over (I am training for really old age!) BUT a simple COPY and LINK is easier when one wants to share a technique.

I have no desire to do a website, I am not selling anything, but I really am curious as to how to show off my work in a way that I can find it again to share.

MINI-SURVEY:
1-what do others look for in a quilt blog?

2- does the writer need to write for self or for readers

3- b/c we can edit- would it make sense to post pictures (wordless) and fill in the back story over time when one had time or interest. Kinda like saving a spot for a quilt or project to be revealed latter.
4- plz share what you would like to 'see' or sites that 'show' in a way that you are interested in.

I started my original blog so I could have a banter of ideas between quilt friends and have a journal of sorts for my kids on the quilts I have made. This is my 3rd time starting over. Is this site the place to be to try again? What Say YOU? Do I throw it all out there and see what sticks?- be good cw


To make it worth commenting, I will send a packet of the little butterfly appliques to the first 50 who respond. Leave your comment here on this post. AND send me your mailing addy (my e-mail is OzarkCastle@yahoo.com )

Thursday, August 20, 2009

One MORE- up to FOUR!


Karlee picked the border color for this little top.
She actually picked all the block borders too.
I think she is going to be a little quilter.
It is so much fun to have her 'help' me in the sewing room.
Today she helped pick up threads and scraps that ended up on the floor.
Karlee is 2 1/2 and a joy to be around. So far she is our only grand-daughter. I tease her that she has to learn to sew b/c grandma is giving her all the stash!
She laughs and says: But grandma, I'm just a little girl- give it to my momma. Too funny.

Look-See, I did Three!

I planned to make one set of the blocks into a small quilt top using a black Swiss to border the pieces.

When I pulled the fabric to get started I realized that there were several different ones including this Navy.

Even though it is 'dark' the blue works well.

Can't wait to see this one quilted!


I Have just enough 'blocks' to make one more little quilt. Plans are to border each block with misc. Swiss (I still have orange,greens,yellows etc...) I am also considering just using different blacks and blues. After laying out the stash it turned out the there are different size dots and slight color variations even in the blacks.


Here are the THREE so far. I like the texture of the bumpy fabrics. Hopefully I will have baby gifts for awhile!
-cw

Tuesday, August 18, 2009

Stripes: Look you I can DO TWO!

Here I go again- I just had to 'see' what the blocks looked like bordered with the darker Swiss Dots.

One can never have two many small quilts on hand and I wanted a little 'No Brain" sewing time tonight.


Long day at work.


The scrapes that I am cutting for borders have been used for clothing or other who knows whats. There really aren't big pieces to strip cut but I was able to made do.


I think I like the effect enough that for the Third Top in this series I am going to border the blocks with the rest of the colors of Swiss Dots. I have several shades of green, more reds, orange, yellow, blues & black.


I hope to have enough Black Dots to make a forth top. (Bet that one will be my favorite!) If it works out I plan to border all twelve blocks and then either set on point or re-cut all wonky and assemble back together.

The darker dots make the squares 'pop'. I think that is what I didn't like about the top I made yesterday, it was too pastel, too quiet. This is a little more exciting to look at and I am hoping the next one will demand attention.


Here is a picture of the two so far. The ceiling fan is blowing them around a bit, it looks like they are waving!


Yesterday's post I offered to give a set of these blocks away, I am glad there were no takers. I am kinda getting a kick out of setting the tops together. Can't wait to get the time to quilt them.